How To Setup Your Shopify eCommerce Store: Store Launch Checklist
Do you know that almost one-third of the eCommerce population in the US prefers Shopify for online store development? Its ease of use and design and customization features are the topmost reasons.
Other factors that determine the popularity of Shopify are its security and SEO features, which make the online store user-friendly. Its all-in-built features enable you to save time when searching for a hosting provider or any software.
On average, it only takes fifteen to thirty minutes to set up an online Shopify store and get it running, while you can still add product images and videos later. This article critically discusses steps to setting up your Shopify eCommerce store and the store launch checklist, which will ensure your store's launch success.
Step 1: Sign Up For Shopify
The first step towards Shopify store setup is simple. Visit the Shopify website and click on the "Start Free Trial" button. Now, fill in the basic information like email address, password, and store name.
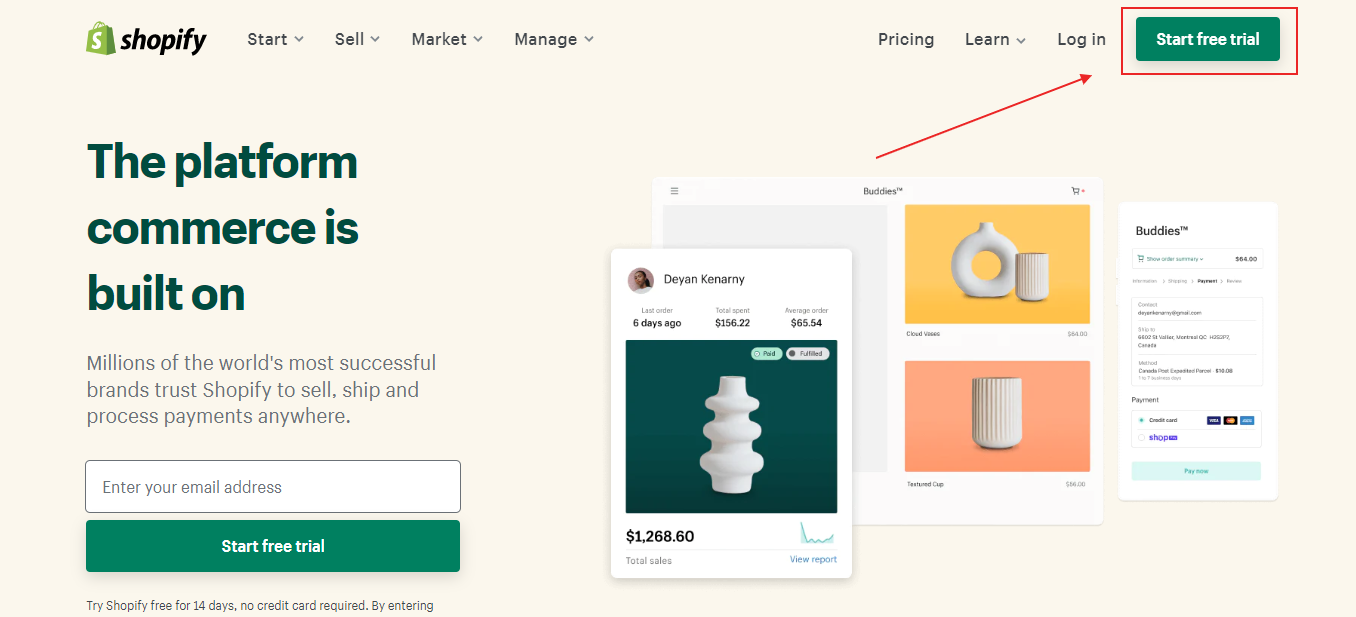
P.S - Choose a unique name that represents your products and services. Next, Shopify will ask how much you wish to sell or if already selling. Choose the one you are already into or are new to online selling.
Then, continue to the next process by clicking on the "Enter My Store" button. The next step will ask you if you want to make a brick-and-mortar store or an online shop. As we are concerned about developing an online shop, so click on "Online Shop".
The next process will ask you to enter personal information like name, address, phone number, etc., which will be used to configure tax rates and currencies. So enter them and you’ll be moved to the next step of store setup.
Step 2: Add Products To Your Store
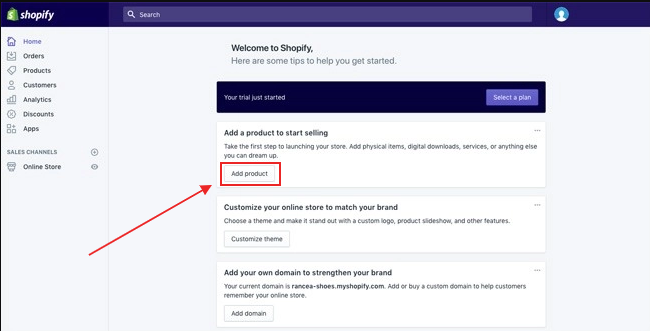
Once you are done signing up for Shopify, it will take you forward to the admin screen of your new website. Through this admin dashboard, you can upload products and customize your shop via themes, layouts, sections, pages, etc.
Shopify outlines a proper step-by-step process on how to completely set up your shop. The first button on the Shopify backend suggests adding a product so click on it and start adding some of your products.
The products add a page of Shopify that is similar to WordPress. Fill in the required details and try to fill each aspect of the product, like title, meta description, images, price, and vendor, and remember to save the product at the end.
Lay critical emphasis on uploading high-resolution and appealing images as it can make or break your customer conversion rates. To ease this down, think as per your target audience to understand their perception of the website visuals.
You can also create different collections or groups and add products matching the needs of the customers. This will make it easier for your customers to find the items as well as set clear navigation for the same.
Step 3: Customize Your Shopify Website
After you are done adding your products, remember to enhance your Shopify store's look. Go to the main dashboard and click on the ‘Customise the Look of Your Website’ button. You can customize the visual appearance of your website, from logos to colors.
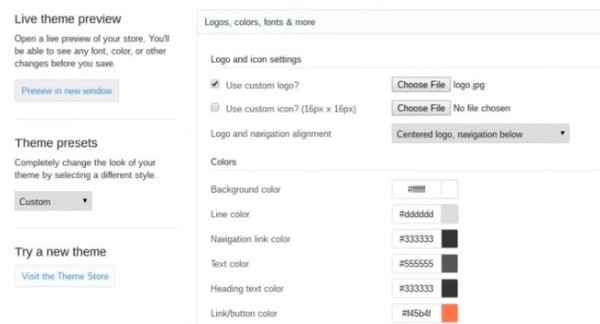
You can choose from a variety of themes, from free themes to premium themes. Free themes are good to start with but provide limited customization options, whereas premium themes are proficient in providing unlimited customization options.
Thus, it is always recommended to choose premium themes. Go through a variety of themes that suit your website and customize it from the options available. However, if you are CSS and HTML enabled, you can enable many important aspects and visual features.
It will always be advisable to give it the most visual appeal by referring it to the professionals who have impeccable experience. You can refer to the Shopify Experts page to get your expert coding in-house team. Even if you have other important aspects to work on, focus on the Shopify Experts community as they are equipped with almost all eCommerce technologies.
Need Shopify developer for your store. Click here
Step 4: Setup Your Shopify Domain
The next process after you customize your website is setting up your Shopify domain to make it live. Go back to the admin dashboard and click ‘Add a Domain’. Shopify will ask you if you want to register a new domain or transfer one.
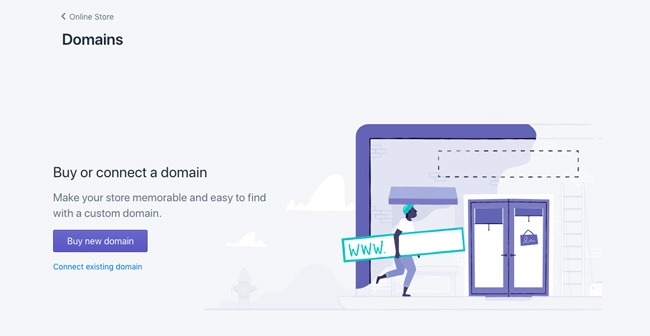
If you already have one and want to migrate, then choose transfer, or if you are completely new, select ‘Register a Domain’. However, you can also buy a domain name. elsewhere outside Shopify and add it to your Shopify store or you can purchase from Shopify and add it to your store.
In case, you are uploading an existing domain, make sure you update DNS records. Once you activate, you can go to that particular domain and see your website. Later, you’ll be asked which payment method you’d like to use
Step 5: Integrate Your Preferred Payment Gateway
The last but not the least step is the integration of preferred payment gateways to the Shopify eCommerce store. To integrate this, go back to the admin dashboard and click on the 'Payments’ tab on the left.
Shopify will enlist several types of payment processors, such as authorize.net and Stripe. Shopify also provides its payment processor which is easy to set up and activate. Shopify’s payment gateways allow accepting payments and putting those in the account.
Your preferred payment gateway will ensure the transaction fees, offsite checkout, etc. thus it is one of the most important aspects you strictly need to take care of. Each payment gateway has its own way to set up and activate.
Focus on the most popular and used payment gateways to get hold of your customers. However, do not move forward without double-checking the payment gateway. Make a test order with different gateways like Stripe, Authorize, credit card, card on delivery, etc. before you make your website live.
You can also click on ‘Bogus Gateway’ to test your payment gateways to test your order just like a customer.
Store Launch Checklist
- Prepare Pre-Launch Marketing Plan: A pre-launch marketing plan is an ace way to quickly gain brand recognition and your first customers. Outline a detailed marketing strategy by activities and campaigns categorized with launch dates and channels. Start by defining your marketing objectives, customer contact information collection, campaign start and end dates, and preferred channels. You can choose from a spectrum of marketing channels like Facebook, Google, Instagram, Launchpad, etc. You can also consider creating pre-marketing automation in Shopify. This helps you set automation workflows that send emails to your customers when a specific milestone or trigger has been met. Automation workflows help in reaching milestones based on customer journey and behavior, which helps in identifying customers' activity on the website. Considering a pre-launch marketing plan helps convert visitors into customers on an ongoing basis.
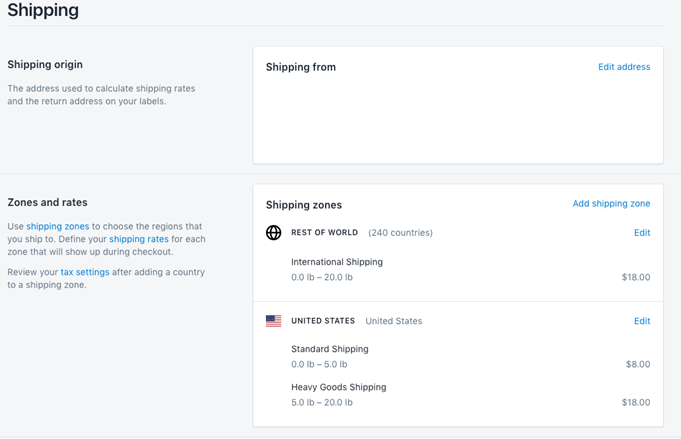
- Add Shipping and Tax Details: One of the most essential pieces of information that triggers the sale-making process is the shipping and tax details. There are many segments of tax categorized based on locations, products, costs, etc. However, tax details are also based on the business and customers’ location to add sales tax. It is important to ensure you have correctly entered your tax and shipping details or else you might end up charging yourself high. Define the shipping charges by considering the weight of the product and area of sale like local, regional, national and international. While you can also consult an expert regarding the tax details or research it yourself, Make sure you correctly enter these details so that you don’t face government order issues and shipping-related problems. Thus, it is one of the most required parts of the Shopify launch checklist.
- Setup Billing Information: Set up your billing information to activate your paid plan. If you have already used your 14-day free trial on Shopify, setting up billing information is a must to avoid any hiccups when your store is live.
- Install Essential Apps: The Shopify app store lets you optimize your online store and gather potential visitors that can turn into customers. There are several types of apps, from marketing, and analytics to website designing. These apps collect insightful customer information in various ways and provide useful guidance to help create a customer-centric store. This information can be used to trigger ongoing marketing activities like:
Product recommendations
Email and SMS marketing
Rewards and loyalty programs
Product reviews
Push notifications
Live chat and chatbots
Pop-Ups
Referral programs
SEOHowever, strictly identify your store's marketing requirements and research various applications that align with them. As there are tones of applications available in the Shopify app store, you’ll probably end up confused and buying the one that may even not deliver you the results. - Conduct Audit and Optimise Content and Images: Conducting a thorough audit on Shopify store content and images lets you set your store search engine optimized. Optimizing content and images helps in efficient Google ranking and improving User Interface and User Experience. The more high resolution and accurately placed pictures are, the more are the conversion rates. Similar statistics go for content as well, the more inclusion of keywords and appropriate placing of content in the meta description, title, and user-generated are, the more are the conversion rates. Images, videos, and content play a vital role in converting visitors into customers. Thus, this is an essential part of the checklist that should not be avoided for your Shopify eCommerce store.
- Recheck Your Payment Gateways: Payment gateways are an essential part of your Shopify store which ensures your customers make a purchase. Critically analyze different payment methods that your customers can opt for to make online purchases. Similarly, gateways like Cash on Delivery (COD) are popular in many Asian countries. Thus, ensure you emphasize customer purchase behavior and checkout options so that it's seamless and you make a successful sale. Once you check all these options, remember to place test orders that include payment through various modes and the reversal of the same.
- Install an Analytics Tool: Analysing every bit and piece of your online store is as essential as your Shopify store setup. Analytics tool helps in collecting useful customer data from several sources and providing guidance to analyze the losing and gaining points. You can get an insight into where your customer leaves product browsing, why does your customer abandon your cart, etc. These insights help in determining the customer behavior and ensuring the application of certain processes that corrects the customer journey. Thus, the analytics tool is one of the most important parts of the checklist and should not be kept aside for consideration. However, you can also use Google Analytics to analyze your store. However, Google Analytics is a powerful tool to analyze content-related websites. And as far as Shopify eCommerce stores are concerned, Google Analytics may not provide value to the eCommerce stores like abandoned carts, long and confusing checkouts, website crashes, etc.
- Design Static Pages: Apart from shop pages, lay important emphasis on designing a few static pages like about us, homepage, contact, FAQS, etc. This helps customers to know more about you and your business and connect with it. The homepage is the first page that your visitors will land or go to; thus, set clear navigation to the homepage minimizing the distractions. Whereas, design an attractive about us page with quality content that connects with visitors. This is the first way to personally connect with your visitors thus, prepare it to ensure the business is among them. Nonetheless, the contact page ensures your customers, visitors, and prospect business opportunities reach you frequently. Through contact pages, customers can reach you for issues, support, assistance, etc. while others may include prospect business opportunities, offline store assistance, etc. The Frequently Asked Questions (FAQS) page is an important page that guides customers at the first point. Customers can get quick and instant solutions to their queries and issues, thus minimizing the rate of support emails and delayed assistance.
Conclusion
Shopify store setup is easy to initiate, control, and monitor however, lay important emphasis on user interface and user experience theme design. UI and UX-enabled themes tend to interact and appeal more to the customers as compared to the stores not taken care of.
It is also advised to consult expert Shopify eCommerce designers as they are proficient in building eCommerce stores and can provide insightful information that can help your store skyrocket.
